 If you’re the type of man that cuts his hair on his own, you should know by now not only how to use but also how to get the best out of your trimmers and clippers. The more dedicated you are to your clippers and trimmers, the more you’re going to know about them and how to take care of them.
No matter how great you are when it comes to grooming and cutting hair, knowing how to maintain your tools is essential, at the end of the day. You can’t work well if your tools are dull so sharpening them from time to time is something you should add on your skill list.
Page Contents
What is an Andis T-Outliner?
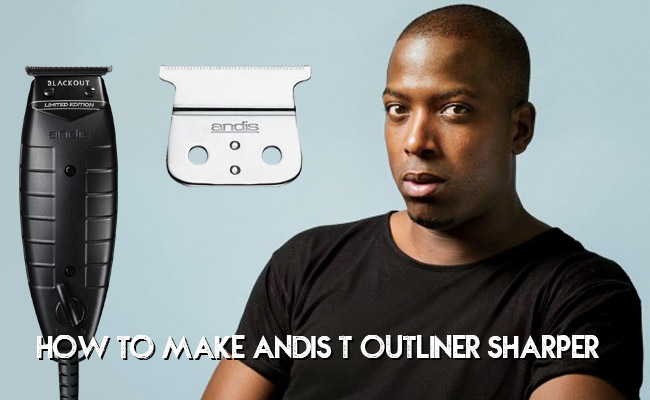
For anyone new to this field, it’s important to know that an Andis T-Outliner is a professional trimmer that is great for trimming mustaches, necks, and beards. If you’re patient and dedicated, you’re going to be able to use it around the ears too. Some use the Andis T-Outliner when shaving as there’s no need for shaving cream anymore.
The special T-blade design of this tool recommends them for the use on these specific jobs as it minimizes risk for crooked and misshapen edges.
When you take a closer look at the T-Outliner blade, you’re going to notice that it features multiple fine teeth that are places close to each other, ensuring a close cut or shave.
The blade of the Andis T-outliner is made from high carbon steel that lasts for a long time. Nevertheless,
no matter how great this little tool may be, you still need to re-adjust its blades from time to time. Don’t worry, you didn’t get yourself a lemon. It’s quite normal for the blades to need re-adjustments every now and then, especially if you’re using them on regular basics. Last thing you want during some trimming is any nicks or cuts.
If you have been using your Andis T-Outliner for some years now, it’s quite normal for the blade not to be sharp as before. It only means it’s time for a good session of sharpening.
But this is just one of the signs that your Andis T-Outliner needs sharpening. Rattling may happen also when you turn it on, which is a good call for a sharpening.
If you still want your trimmer to work properly, it’s better not to postpone the sharpening. It may sound complicated and challenging, but as long as you follow some simple steps, you’re going to be able to sharpen the Andis T-outliner blade even faster than you thought.
What you need
It’s better to prepare all the items that you’re going to need for sharpening the blade on your Andis T-Outliner.
This include:
- Toothbrush, clipper brush or a dry cloth
- Clipper oil
- Coolant spray
- Philips screwdriver
Always play it safe and start by turning off the trimmer, by disconnecting it from the mains power supply.
You may also use a rubber mat or a towel so you don’t lose any of the screws you’re going to have from dissembling the trimmer.
How to sharpen the blade
The steps aren’t many, but you need to pay attention to each of them:
Start with the Philips screwdriver
Use the small Philips screwdriver to remove the two screws place on the front of the casing. If this is the very first time when you’re doing it, take your time and carefully pay attention to what’s inside the T-Outliner.
As you’re looking at the blade, you’re going to notice a hole, which is known as the blade tension spring hole. At the end of the spring you’re supposed to see the tension spring ball.
As you move along, you’re going to also notice the blade tension spring screw which is the main force for applying the tension to the spring, which in turn holds the blade. Keep in mind that even if the blades are straight and sharp, when the tension isn’t applied in the right place, your trimmer isn’t going to cut.
You should also pay attention until you find the blade arm, which actually moves the blade left to right. A magnetic motor that powers the blade should also be in there.
Continue work
we’re going farther with the explanations, which is why we couldn’t find the proper name for this step.
You need to remove the tension spring screw and place it in a safe area, where you’re going to see it easily.
Now it’s time to really figure out where the problem was in the first place.
You should lift the position of the tension spring using some pliers. It’s also very important that it’s right above the hole, so that it’s even. Continue by using the pliers to bend it until the ball is eventually resting on the blade, but only when the position is right. This is going to give you the right amount of tension that is going to be applied later on.
Once you’re done with this part, you may replace the tension spring screw. You should be turning it until the ball is springs back into the hole and only leaves a very narrow gap above. The shape may look like half of a moon to you.
This little detail is fundamental for best performance later on. When the gap is too big, the cutting is going to be impaired.
Clean the trimmer
Now that your trimmer is all open, you should also take of the cleaning as you want to minimize risk for possible malfunction.
Use a small brush or even a used toothbrush and softly brush the trimmer. The plan is to remove any hair left inside the mechanism.
An Andis T-outliner may also perform poor because of the dirt and residue inside. You need to remove every hair and dust that you’re going to find, gathered inside the trimmer.
Hone the blade
There’s no use into opening your trimmer if you’re not honing the blade too.
You may do this by placing the hone on a flat surface and position the blade. Make sure the sharp side of the blade is facing outward.
Remember that the blade of the trimmer features quite many teeth, so you need to be patient to sharpen nice and easy each one of them. You don’t want to chip any of the teeth, for sure.
Try as much as you can not to use much force when sharpening it, as you may end up damaging the blade. Only use enough pressure to slide the blade from left to right. You should do this on the other side of the blade as well.
Put everything back on
Now it’s time to put the front of the clipper back on. This should be done only after you checked that the wires that have become untucked are placed inside the case again. Make sure that all screws are fasten tightly.
You need to put everything back together and only afterwards turn on your Andis T-Outliner. You’re going to hear an obvious difference, for sure.
As you set it on a final position of the bottom blade, you need to make sure the teeth of the bottom and top blades aren’t evenly matched. Even if you don’t really get it, keep in mind that it’s the ability of the uneven teeth to move back and forth is what makes the clippers cut your hair in the first place.
Oil the trimmer
When you’re taking care of the trimmer, you have to do it all the way, and this means to oil it right too.
Pour only a small amount of oil on the top and the sides of your trimmer. This way you’re going to help the mechanism run even smoother, with minimal risk for jamming. Oiling the trimmer is also going to extend its life span and lower the risk for getting rusty any time soon.
One final piece of advice
If your Andis T-Outliner still isn’t running well after all of these steps, it may be that the blade’s teeth are already chipped. Maybe it’s time you consider getting a new blade so that you may still be able to use the trimmer.
No matter how tight your budget is, it’s better to never use your trimmer if it’s in a poor shape, as you may end up with some ugly cut.